現在のブログ
ゲーム開発ブログ (2025年~) Gamedev Blog (2025~) 游戏开发博客 (2025年~)
レガシーブログ
テクノロジーブログ (2018~2024年) リリースノート (2023~2025年) MeatBSD (2024年)
【C++】First Game Creation Guide
You're an experienced "systems engineer" who wants to create their first game in life but doesn't know where to start.
Well, give up.
You can't make a game.
Just kidding!
I will introduce how to make your first game as clearly as possible.
You might be thinking, "But you're discussing extremely advanced topics that no one else can understand."
Don't worry.
This time, I'll make it as beginner-friendly as possible!
However, I have one request.
Please read this article carefully and rewrite every line of code yourself in a text editor or IDE.
This is the only way to truly learn how to make games.
Game
I decided to make a simple Snake game.
Snake is a very good beginner-friendly game.
While it's not difficult to create, it teaches all the fundamentals needed for more complex games later.
It includes many elements such as the game play loop, collision detection, randomness, background rendering, scene management, score system, fonts, real-time user input, etc., and these exist in all games on Earth.
You can check the completed project here.
Dependencies
The following tools are required:
- A C++ compiler that supports C++20 or later (As of 2026/06/22, C++20 is supported by most compilers)
- CMake
- Your favorite editor (I use Visual Studio 2022)
- Raylib
- Git
At the time of writing, the latest version of Raylib is 6.0.
When you open the Microsoft GitHub releases page, you will find many versions such as "linux_amd64", "macos", "win32_msvc16", etc.
Do not download those.
Instead, download "Source code (zip)" or "Source code (tar.gz)".
Quick access link: https://github.com/raysan5/raylib/archive/refs/tags/6.0.zip
Create an empty directory named "Snake".
Inside it, create the following directories:
- src
- include
- deps
Put all source code except main.cc in the src directory.
Place main.cc in the project root.
Put all header files in the include directory.
This creates a clean interface in the code.
Place Raylib in the deps directory.
Unzip the Raylib ZIP or Tarball, rename raylib-6.0 to raylib, and delete the following files and directories:
$ rm -rf BINDINGS.md CONTRIBUTING.md CONVENTIONS.md HISTORY.md ROADMAP.md SECURITY.md build.zig build.zig.zon CHANGELOG LICENSE logo projects examplesLet's test if compilation still works.
$ cmake -B build -DCMAKE_BUILD_TYPE=Release -DBUILD_EXAMPLES=OFF
-- Testing if -Werror=pointer-arith can be used -- compiles
-- Testing if -Werror=implicit-function-declaration can be used -- compiles
-- Testing if -fno-strict-aliasing can be used -- compiles
-- Using raylib's GLFW
-- Including X11 support
-- Audio Backend: miniaudio
-- Building raylib static library
-- X11 support enabled for raylib
-- Generated build type: Release
-- Compiling with the flags:
--   PLATFORM=PLATFORM_DESKTOP
--   GRAPHICS=GRAPHICS_API_OPENGL_33
-- Configuring done (20.6s)
-- Generating done (1.9s)
-- Build files have been written to: /home/suwako/w/dev/learn/Snake/deps/raylib/build
$ cmake --build build
[  3%] Building C object raylib/external/glfw/src/CMakeFiles/glfw.dir/context.c.o
[  6%] Building C object raylib/external/glfw/src/CMakeFiles/glfw.dir/init.c.o
[ 10%] Building C object raylib/external/glfw/src/CMakeFiles/glfw.dir/input.c.o
[ 13%] Building C object raylib/external/glfw/src/CMakeFiles/glfw.dir/monitor.c.o
[ 16%] Building C object raylib/external/glfw/src/CMakeFiles/glfw.dir/platform.c.o
[ 20%] Building C object raylib/external/glfw/src/CMakeFiles/glfw.dir/vulkan.c.o
[ 23%] Building C object raylib/external/glfw/src/CMakeFiles/glfw.dir/window.c.o
[ 26%] Building C object raylib/external/glfw/src/CMakeFiles/glfw.dir/egl_context.c.o
[ 30%] Building C object raylib/external/glfw/src/CMakeFiles/glfw.dir/osmesa_context.c.o
[ 33%] Building C object raylib/external/glfw/src/CMakeFiles/glfw.dir/null_init.c.o
[ 36%] Building C object raylib/external/glfw/src/CMakeFiles/glfw.dir/null_monitor.c.o
[ 40%] Building C object raylib/external/glfw/src/CMakeFiles/glfw.dir/null_window.c.o
[ 43%] Building C object raylib/external/glfw/src/CMakeFiles/glfw.dir/null_joystick.c.o
[ 46%] Building C object raylib/external/glfw/src/CMakeFiles/glfw.dir/posix_module.c.o
[ 50%] Building C object raylib/external/glfw/src/CMakeFiles/glfw.dir/posix_time.c.o
[ 53%] Building C object raylib/external/glfw/src/CMakeFiles/glfw.dir/posix_thread.c.o
[ 56%] Building C object raylib/external/glfw/src/CMakeFiles/glfw.dir/x11_init.c.o
[ 60%] Building C object raylib/external/glfw/src/CMakeFiles/glfw.dir/x11_monitor.c.o
[ 63%] Building C object raylib/external/glfw/src/CMakeFiles/glfw.dir/x11_window.c.o
[ 66%] Building C object raylib/external/glfw/src/CMakeFiles/glfw.dir/xkb_unicode.c.o
[ 70%] Building C object raylib/external/glfw/src/CMakeFiles/glfw.dir/glx_context.c.o
[ 73%] Building C object raylib/external/glfw/src/CMakeFiles/glfw.dir/linux_joystick.c.o
[ 76%] Building C object raylib/external/glfw/src/CMakeFiles/glfw.dir/posix_poll.c.o
[ 76%] Built target glfw
[ 80%] Building C object raylib/CMakeFiles/raylib.dir/raudio.c.o
[ 83%] Building C object raylib/CMakeFiles/raylib.dir/rcore.c.o
[ 86%] Building C object raylib/CMakeFiles/raylib.dir/rmodels.c.o
[ 90%] Building C object raylib/CMakeFiles/raylib.dir/rshapes.c.o
[ 93%] Building C object raylib/CMakeFiles/raylib.dir/rtext.c.o
[ 96%] Building C object raylib/CMakeFiles/raylib.dir/rtextures.c.o
[100%] Linking C static library libraylib.a
[100%] Built target raylib
It works.
If you are using Neovim or another text editor that can access clangd, place the following .clangd file in the project root:
CompileFlags:
  Add:
    - -I./include
    - -I./deps/raylib/src
    - -L./build/deps/raylib
    - -std=c++20
    - -Wno-pragma-once-outside-header
What is Raylib
Raylib is basically a more modern SDL or SFML.
It's a very ambitious project, but it's extremely easy to use, has excellent documentation and support, supports a wide range of platforms, and is a lot of fun to use.
I used to recommend SDL for beginners, but now I recommend Raylib.
CMake
Before we start, let's create the CMake file.
What is CMake?
CMake creates makefiles!
What is a makefile?
A makefile creates the project!
What!? How did it come to this!?
This is why I couldn't like CMake for many years.
However, after using it in real projects (currently all closed source, but some will be open sourced later), I found it to be an excellent tool for cross-platform, cross-editor compilation.
Especially when using Visual Studio, it eliminates the hassle of manual property editing and file management, and CMake handles everything consistently across all projects for the entire team.
This allows you to spend that wasted time on actual programming.
The downside is its very idiosyncratic syntax that changes significantly with each version.
Even when working with Neovim, Emacs, or Visual Studio Code, it excels at compiling only the changed code instead of recompiling everything every time.
This greatly speeds up iteration in large projects.
Fortunately, you only need to set it up once at the start of the project, and if set up correctly, you can forget about it.
cmake_minimum_required(VERSION 3.16...3.28)
project(snake LANGUAGES CXX VERSION 1.0.0)
set(CMAKE_CXX_STANDARD 20)

if(NOT CMAKE_BUILD_TYPE AND NOT CMAKE_CONFIGURATION_TYPES)
  set(CMAKE_BUILD_TYPE "Debug" CACHE STRING "デバッグ又はリリース" FORCE)
endif()

set(CMAKE_CXX_STANDARD 20)
set(CMAKE_CXX_STANDARD_REQUIRED ON)
set(CMAKE_CXX_EXTENSIONS OFF)

set(BUILD_EXAMPLES OFF CACHE BOOL "Raylib例のプロジェクトを無効化" FORCE)
set(BUILD_SHARED_LIBS OFF CACHE BOOL "静的リンク" FORCE)

if(MSVC)
  set(CMAKE_MSVC_RUNTIME_LIBRARY "MultiThreaded$<$<CONFIG:Release>:Release>")
  set(CMAKE_MSVC_RUNTIME_LIBRARY "MultiThreaded$<$<CONFIG:Debug>:Debug>")
  add_compile_options(/utf-8)
endif()

add_subdirectory(deps/raylib)

file(GLOB_RECURSE SNAKE_SRC CONFIGURE_DEPENDS "${CMAKE_CURRENT_SOURCE_DIR}/src/*.cc")
file(GLOB_RECURSE SNAKE_INC CONFIGURE_DEPENDS "${CMAKE_CURRENT_SOURCE_DIR}/include/*.hh")

add_executable(snake main.cc ${SNAKE_SRC} ${SNAKE_INC})
set_target_properties(snake PROPERTIES CXX_STANDARD 20)

if(UNIX)
  message(STATUS "${CMAKE_SYSTEM_NAME}で静的リンクが不可能為、動的リンクで伺います。")
endif()

if(CMAKE_BUILD_TYPE STREQUAL "Debug" OR CMAKE_BUILD_TYPE STREQUAL "RelWithDebInfo")
  set(PRODUCTION_BUILD OFF CACHE BOOL "リリース版?" FORCE)
else()
  set(PRODUCTION_BUILD ON CACHE BOOL "リリース版?" FORCE)
  if(WIN32)
    set(INSTALL_BINDIR "C:/Program Files/TechnicalSuwako/Snake")
  else()
    set(INSTALL_BINDIR ${CMAKE_INSTALL_BINDIR})
  endif()
endif()

install(TARGETS snake
  RUNTIME DESTINATION ${INSTALL_BINDIR}
  PERMISSIONS OWNER_READ OWNER_WRITE OWNER_EXECUTE GROUP_READ GROUP_EXECUTE WORLD_READ WORLD_EXECUTE
  COMPONENT Runtime
)

if(MSVC)
  set_property(DIRECTORY ${CMAKE_CURRENT_SOURCE_DIR} PROPERTY VS_STARTUP_PROJECT snake)
  target_compile_definitions(snake PUBLIC _CRT_SECURE_NO_WARNINGS)

  if(PRODUCTION_BUILD)
    set_target_properties(snake PROPERTIES LINK_FLAGS "/SUBSYSTEM:WINDOWS /ENTRY:mainCRTStartup")
  endif()
elseif(MINGW)
  if(PRODUCTION_BUILD)
    target_link_options(snake PRIVATE -mwindows)
  endif()
elseif(APPLE OR UNIX)
  if(PRODUCTION_BUILD)
    target_link_options("${CMAKE_PROJECT_NAME}" PRIVATE -s)
  endif()
endif()

target_link_libraries(snake PRIVATE raylib)

target_include_directories(snake PRIVATE "${CMAKE_CURRENT_SOURCE_DIR}/include")
Step by step, here we define the minimum required CMake version, project name, and C++ standard.
We force static linking and prevent Raylib samples from being built (we deleted them, but Raylib's CMakeLists file tries to build them by default).
Set our own include and source directories, and ensure static linking again on Windows, but dynamic linking everywhere else.
We also set the install directory and permissions to allow execution.
On Windows, remove the terminal window in release builds, and strip on all other OSes.
Finally, link to Raylib.
If you haven't created it yet, create main.cc in the project root:
$ touch main.ccIf you are using Visual Studio 2022, run CMake as follows:
$ cmake -B build -G "Visual Studio 17 2022" -A x64 -DCMAKE_BUILD_TYPE=Debug
From there, open the build directory and open snake.sln to work.
Instead of creating new files inside Visual Studio, create new files in Windows Explorer or use touch in PowerShell to create files faster.
After that, press CTRL + B to invoke the CMake build, and the Solution Explorer will update automatically.
For everyone else, the commands are as follows:
$ mkdir -p build && cd build
$ cmake .. -DCMAKE_BUILD_TYPE=Debug
$ make
main.cc
#include <iostream>

int main (void) {
  std::cout << "ちんこ" << std::endl;

  return 0;
}
$ cmake -B build -G "Visual Studio 17 2022" -A x64 -DCMAKE_BUILD_TYPE=Debug
-- The CXX compiler identification is MSVC 19.43.34810.0
-- Detecting CXX compiler ABI info
-- Detecting CXX compiler ABI info - done
-- Check for working CXX compiler: C:/Program Files/Microsoft Visual Studio/2022/Professional/VC/Tools/MSVC/14.43.34808/bin/Hostx64/x64/cl.exe - skipped
-- Detecting CXX compile features
-- Detecting CXX compile features - done
-- The C compiler identification is MSVC 19.43.34810.0
-- Detecting C compiler ABI info
-- Detecting C compiler ABI info - done
-- Check for working C compiler: C:/Program Files/Microsoft Visual Studio/2022/Professional/VC/Tools/MSVC/14.43.34808/bin/Hostx64/x64/cl.exe - skipped
-- Detecting C compile features
-- Detecting C compile features - done
-- Performing Test COMPILER_HAS_THOSE_TOGGLES
-- Performing Test COMPILER_HAS_THOSE_TOGGLES - Failed
-- Testing if -Werror=pointer-arith can be used -- Failed
-- Testing if -Werror=implicit-function-declaration can be used -- Failed
-- Testing if -fno-strict-aliasing can be used -- Failed
-- Using raylib's GLFW
-- Performing Test CMAKE_HAVE_LIBC_PTHREAD
-- Performing Test CMAKE_HAVE_LIBC_PTHREAD - Failed
-- Looking for pthread_create in pthreads
-- Looking for pthread_create in pthreads - not found
-- Looking for pthread_create in pthread
-- Looking for pthread_create in pthread - not found
-- Found Threads: TRUE
-- Including Win32 support
-- Audio Backend: miniaudio
-- Building raylib static library
-- Generated build type: Debug
-- Compiling with the flags:
--   PLATFORM=PLATFORM_DESKTOP
--   GRAPHICS=GRAPHICS_API_OPENGL_33
-- Configuring done (16.8s)
-- Generating done (0.3s)
-- Build files have been written to: C:/Users/suwako/dev/learn/Snake/build
The build succeeded in my environment, so we can continue.
Git
Before proceeding any further, set up a local Git repository.
You don't necessarily need to push to Microsoft GitHub or other websites.
I just want to be able to set safe save points using Git.
This allows you to revert to the last working code if something goes wrong and create branches to safely add new features.
I won't demonstrate it in this article, but it's a good habit to follow.
$ git init
Initialized empty Git repository in C:/Users/suwako/dev/learn/Snake/.git/
$ touch .gitignore


    ディレクトリ: C:\Users\suwako\dev\learn\Snake


Mode                 LastWriteTime         Length Name
----                 -------------         ------ ----
-a----        2026/06/21      2:04              0 .gitignore
Add to .gitignore:
build
Add the build directory.
We don't want to include it in Git history.
Because if the content is too large, Git will become significantly slower.
Creating the Window
Let's start with the most basic thing in GUI programming: opening a window.
#include <iostream>
#include <raylib.h>

int main(void) {
  constexpr int screenWidth = 1600;
  constexpr int screenHeight = 900;

#if PRODUCTION_BUILD == 1
  SetTraceLogLevel(LOG_NONE);
#endif
  InitWindow(screenWidth, screenHeight, "Snake");
  SetExitKey(KEY_NULL);
  SetTargetFPS(120);

  bool running = true;

  while (running && !WindowShouldClose()) {
    if (IsKeyPressed(KEY_Q)) {
      running = false;
    }

    BeginDrawing();
    ClearBackground(MAGENTA);
    EndDrawing();
  }

  CloseWindow();

  return 0;
}
When you build and run it: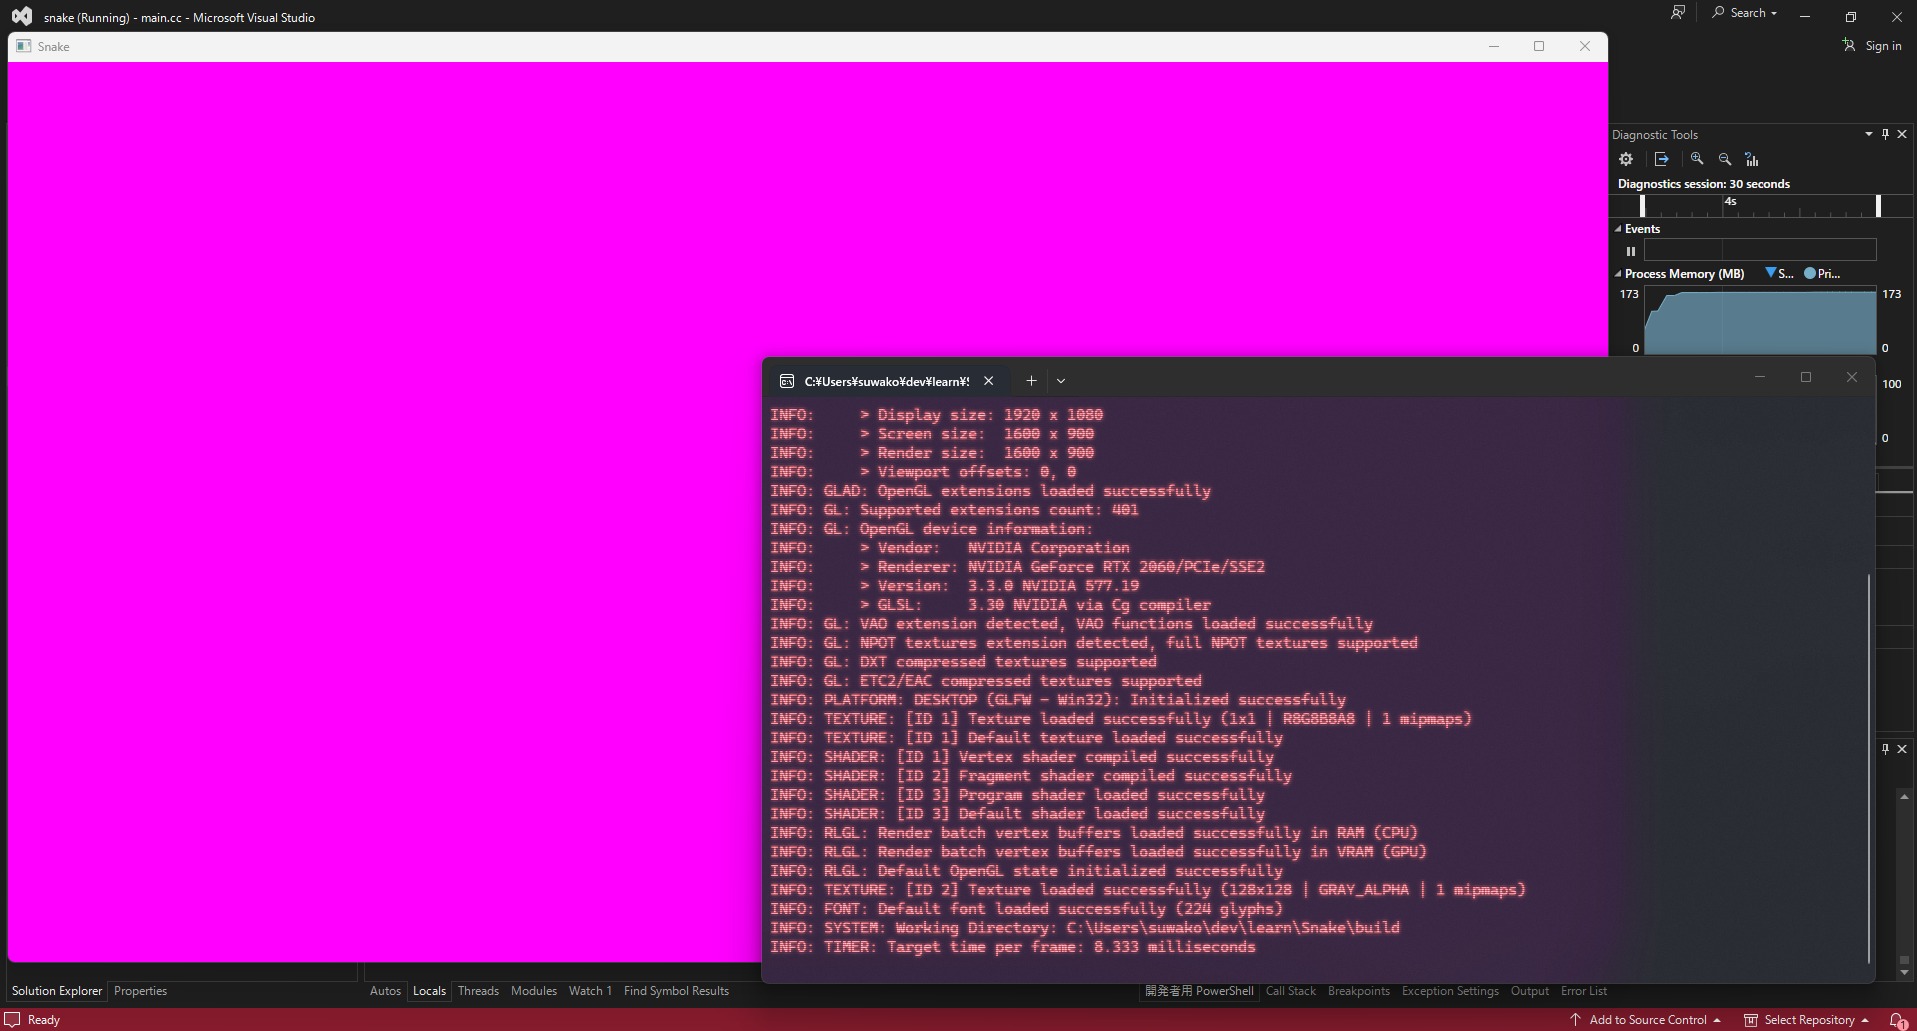
It works!
Raylib's syntax is very easy to understand.
To explain briefly:
- Set variables for screen width and height.
- Disable trace logs only in release builds.
- Make the window resizable.
- Create a new window.
- Prevent the window from closing.
- Set the frame rate to 120 FPS.
- Create a boolean to check if the game is still running.
- Create a game loop, and inside it, set
runningto false when Q is pressed to exit the loop. - Draw magenta color on the window.
- Close the window when exiting.
By default, Raylib closes the window when the Escape button is pressed.
This can be a problem if you want to implement "return to main menu" or pause screens.
These are usually mapped to Escape.
For the running boolean, there is no setting to close because of the ridiculous reason that Raylib only has a function to check if the window should be closed.
Therefore, you need to create your own boolean and ensure both are true.
Visual Studio Tips
There are things to keep in mind.
When thinking about C++, you would intuitively write C++ in an OOP way, follow RAII principles, and free memory everywhere.
This is good C++ in fields where security and memory safety are important.
However, in game development, it is far more desirable to write C++ like C with containers (strings, vectors, maps, etc.) and namespaces.
In game development, speed is everything.
Therefore, security is not a concern unless it's an online multiplayer game or other features involving internet connections.
OOP slows down compile times and causes performance bottlenecks.
Since the OS already handles resource freeing, there's no problem not freeing memory manually unless a crash occurs.
The reason is that when the player closes the window, they expect it to close immediately.
If it has to free everything from memory first when closing, the window appears to freeze for a few seconds while closing, and the player thinks it crashed and tries to force close the window.
What if there's an autosave feature that saves game progress when the window is closed?
If the player force-closes the window, progress isn't saved, they write a bad review on the Steam page, and get angry that progress wasn't saved.
Therefore, in that case, leave memory management to the operating system.
Another tip is not to throw exceptions.
This is completely impossible on game consoles, but on PC, many game studios completely ban or strictly limit them because they cause bottlenecks.
Throwing exceptions is very convenient for systems programming but not suitable for game programming.
Instead, asserts are recommended.
Also, minimize heap allocations to only what's necessary whenever possible.
Memory allocation is slow, so running on the stack is much faster.
However, it's impossible to not allocate any memory at all in C++.
The standard library does it behind the scenes.
It's possible in C.
Avoid polymorphism at all costs.
It not only causes bottlenecks but also complicates your code for no reason.
Finally, avoid putting includes in header files as much as possible.
It slows down compile times and can cause compiler errors where header files loop with each other.
If two files need to depend on each other, use forward declarations instead.
Also, if you're using Visual Studio, try pressing CTRL + K then CTRL + O.
This lets you switch between header and source files, saving a lot of time.
You can generate multiple cursors with Shift + Alt + Up/Down.
Use CTRL + / to comment out lines.
Scene Management
Next, we need to establish the required scenes.
- Title screen
- Main gameplay
- Game over
On the game over screen, provide the player with options to restart the game or exit.
There is no real point in providing an option to return to the title screen.
Because all the title screen does is give the player time to prepare for the game and welcome them in a nice way.
The game over screen already fulfills this function, it just doesn't welcome them as nicely.
Create a scene directory in include and src.
Create title.{hh,cc}, gamemain.{hh,cc}, gameover.{hh,cc} inside it.
$ mkdir -p src/scene include/snake/scene
$ touch include/snake/scene/{title,gamemain,gameover}.hh
$ touch src/scene/{title,gamemain,gameover}.cc
For each header file:
#pragma once

namespace snake::scene {
  struct TitleScreen {
    bool Init();
    bool Update();
    void Close();
  };
} // namespace snake::scene
For each source file:
#include <snake/scene/title.hh>
#include <raylib.h>

namespace snake::scene {
  bool TitleScreen::Init() {
    return true;
  }

  bool TitleScreen::Update() {
    ClearBackground(MAGENTA);
    return true;
  }

  void TitleScreen::Close() {
  }
} // namespace snake::scene
Repeat the same for gameover and gamemain, changing the header file and struct name accordingly.
However, for GameMain, change ClearBackground(MAGENTA); to ClearBackground(BLUE);.
Furthermore:
$ touch include/snake/snake.hh src/snake.cc
#pragma once

namespace snake {
  enum Scene {
    TitleScreen,
    GameMain,
    GameOver,
  };

  extern Scene s;
  extern bool IsRunning;

  bool Init();
  bool Update();
  void Close();
} // namespace snake
For each source file:
#include <snake/snake.hh>

#include <snake/scene/title.hh>
#include <snake/scene/gamemain.hh>
#include <snake/scene/gameover.hh>

namespace snake {
  bool IsRunning = true;
  Scene s = TitleScreen;
  scene::TitleScreen ts;
  scene::GameMain gm;
  scene::GameOver go;

  bool Init() {
    switch (s) {
      case GameMain:
        return gm.Init();
        break;
      case GameOver:
        return go.Init();
        break;
      default:
        return ts.Init();
        break;
    }
  }

  bool Update() {
    switch (s) {
      case GameMain:
        return gm.Update();
        break;
      case GameOver:
        return go.Update();
        break;
      default:
        return ts.Update();
        break;
    }
  }

  void Close() {
    switch (s) {
      case GameMain:
        gm.Close();
        break;
      case GameOver:
        go.Close();
        break;
      default:
        ts.Close();
        break;
    }
  }
} // namespace snake
The reason for making scenes an enum is that if you decide to add another scene like a copyright screen between the title and main game, you can simply add a Copyright value and add a case for Copyright to the 3 functions, and nothing else needs to be changed.
With this method, you can put the following in main.cc:
...
#include <snake/snake.hh>

int main(void) {
...
  bool changeScene = false;
  snake::Init();
  while (running && !WindowShouldClose()) {
...
    if (IsKeyPressed(KEY_ENTER)) {
      changeScene = true;
      snake::Close();
      snake::s = snake::GameMain;
    }

    if (changeScene) {
      snake::Init();
      changeScene = false;
    }

    BeginDrawing();
    snake::Update();
    EndDrawing();
  }

  snake::Close();
  CloseWindow();

  return 0;
}
Now, if you compile and run again, the magenta screen appears again.
Pressing Enter changes the screen to blue.
This confirms that the scene management system is working.
However, just staring at a solid color screen isn't fun.
Let's make a real game.
The changeScene boolean ensures that the old scene is properly closed and the new scene is opened only once.
However, this is a bug.
Because pressing Enter can effectively restart the gameplay loop at any time.
Therefore, it's a better idea to move this to the title screen.
So, the main.cc file becomes:
#include <iostream>
#include <raylib.h>
#include <snake/snake.hh>

int main(void) {
  constexpr int screenWidth = 1600;
  constexpr int screenHeight = 900;

#if PRODUCTION_BUILD == 1
  SetTraceLogLevel(LOG_NONE);
#endif
  InitWindow(screenWidth, screenHeight, "Snake");
  SetExitKey(KEY_NULL);
  SetTargetFPS(120);

  bool running = true;
  snake::Init();

  while (running && !WindowShouldClose()) {
    if (IsKeyPressed(KEY_Q)) {
      running = false;
    }

    BeginDrawing();
    snake::Update();
    EndDrawing();
  }

  snake::Close();
  CloseWindow();

  return 0;
}
And in title.cc:
#include <snake/scene/title.hh>
#include <snake/snake.hh>
#include <raylib.h>

namespace snake::scene {
  bool TitleScreen::Init() {
    return true;
  }

  bool TitleScreen::Update() {
    if (IsKeyPressed(KEY_ENTER)) {
      snake::Close();
      snake::s = snake::GameMain;
      snake::Init();
    }

    ClearBackground(MAGENTA);

    return true;
  }

  void TitleScreen::Close() {
  }
} // namespace snake::scene
This eliminates the need for the boolean, so it's a Win-Win.
Gameplay Loop
Leave the title screen as is.
We'll handle it at the end of this article.
In game development, always focus on the main gameplay loop first.
If the title screen needs functionality, you can put basic placeholder text, but don't spend much time on it at first.
In our case, the only function is to move to the main gameplay loop, so don't worry.
In gamemain.cc:
#include <snake/scene/gamemain.hh>
#include <raylib.h>

namespace snake::scene {
  Vector2 gridPos = { 30, 60 };
  constexpr int CELL_SIZE = 48;
  constexpr int MAX_CELLX = 32;
  constexpr int MAX_CELLY = 17;

  struct Snake {
    Vector2 cell;
    Color color;
  };

  Snake snek = { 0 };

  bool GameMain::Init() {
    snek.cell = { 10, 10 };
    snek.color = RED;

    return true;
  }

  bool GameMain::Update() {
    ClearBackground(BLACK);

    // グリッド
    int cX = static_cast<int>(gridPos.x);
    int cY = static_cast<int>(gridPos.y);
    for (int h = 0; h <= MAX_CELLY; ++h) {
      int y = cY + h * CELL_SIZE;
      DrawLine(cX, y, cX + MAX_CELLX * CELL_SIZE, y, RAYWHITE);
    }
    for (int w = 0; w <= MAX_CELLX; ++w) {
      int x = cX + w * CELL_SIZE;
      DrawLine(x, cY, x, cY + MAX_CELLY * CELL_SIZE, RAYWHITE);
    }

    // プレイヤー
    int pX = static_cast<int>(snek.cell.x) * CELL_SIZE;
    int pY = static_cast<int>(snek.cell.y) * CELL_SIZE;
    DrawRectangle(cX + pX, cY + pY, CELL_SIZE, CELL_SIZE, snek.color);
    DrawText(TextFormat("SNAKE: %.0f, %.0f", snek.cell.x, snek.cell.y), 10, 10, 20, YELLOW);
    DrawText(TextFormat("MAX CELL: %d, %d", MAX_CELLX, MAX_CELLY), 10, 30, 20, YELLOW);

    return true;
  }

  void GameMain::Close() {
  }
} // namespace snake::scene
Here, we change the background color to black to make it less tiring on the eyes.
Next, we draw the grid and the player, but nothing moves yet.
We also draw debug text for the player's position.
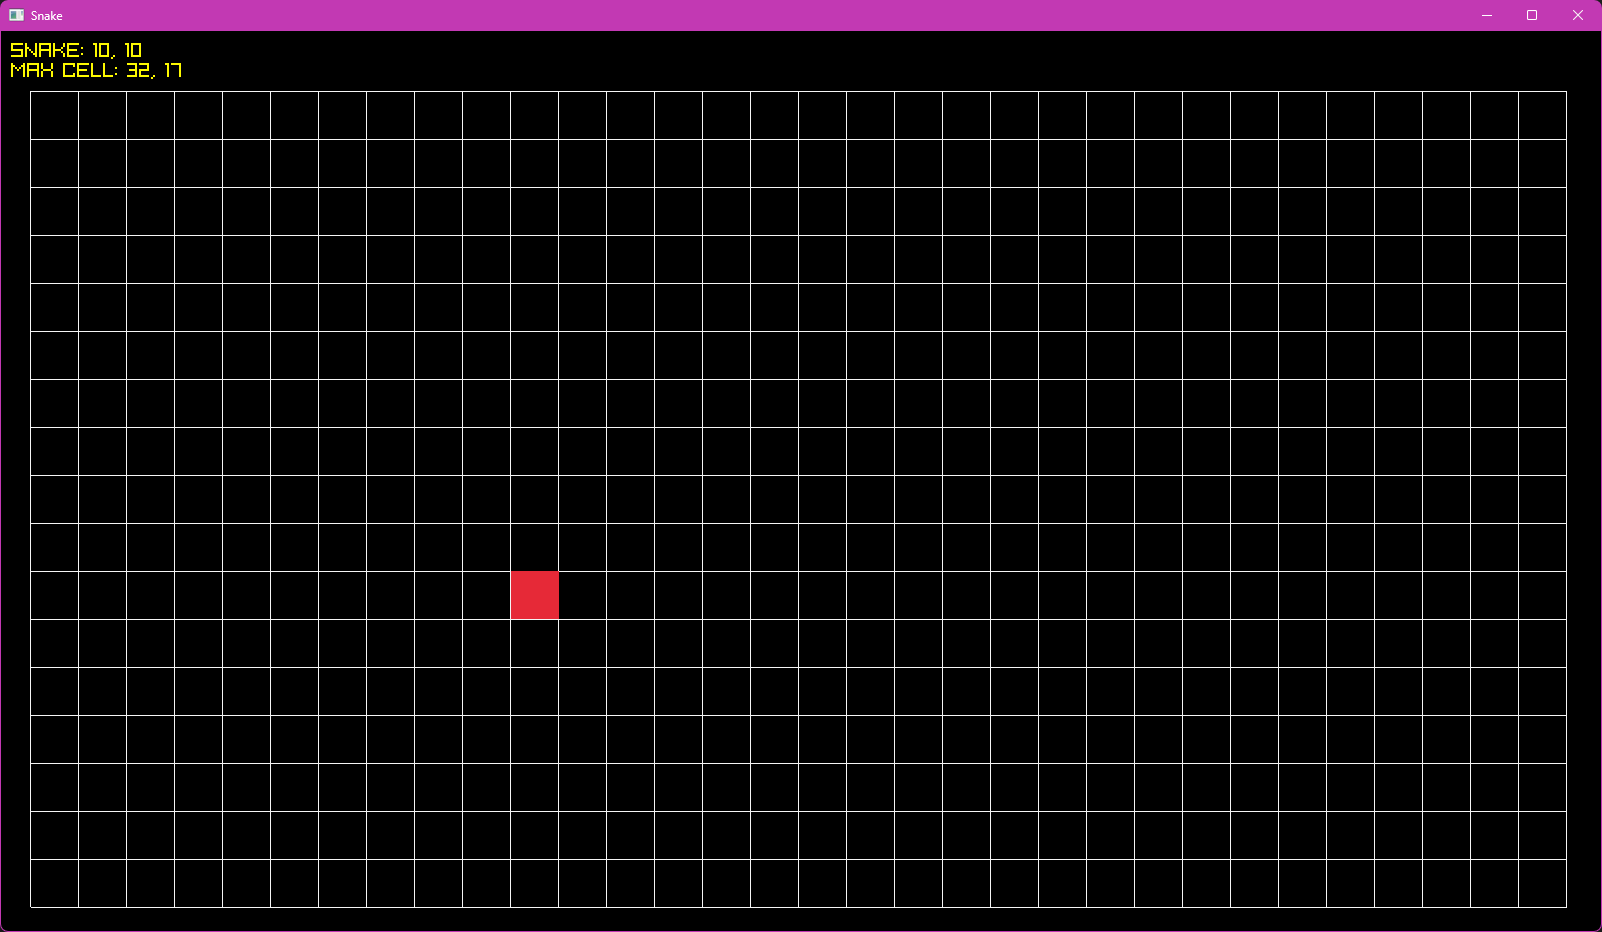
But a 1600x900 window might not be ideal for laptop users.
I think 800x600 is more appropriate.
Fortunately, that only requires changing a few variables.
main.cc:
...
  constexpr int screenWidth = 800;
  constexpr int screenHeight = 600;
...
...
...
  Vector2 gridPos = { 16, 54 };
  constexpr int CELL_SIZE = 24;
  constexpr int MAX_CELLX = 32;
  constexpr int MAX_CELLY = 22;
...
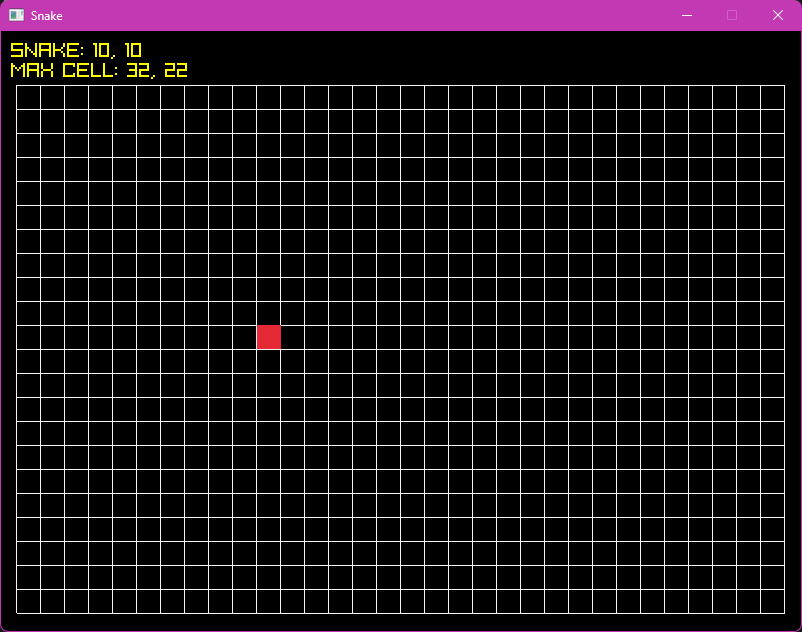
Much better!
However, now we need to make this movable.
We need to record the movement direction so that if the snake is moving up/down, only left/right can be pressed, and if moving left/right, only up/down.
We want to prevent it from colliding with itself.
...
  enum SnakeDir {
    Up,
    Down,
    Left,
    Right,
  };

  struct Snake {
    Vector2 cell;
    Color color;
    SnakeDir dir;
    SnakeDir nextDir;
  };
...
  bool GameMain::Init() {
    snek.cell = { 10, 10 };
    snek.color = RED;
    snek.dir = Right;
    snek.nextDir = snek.dir;

    return true;
  }

  bool GameMain::Update() {
    if (snek.dir == Left || snek.dir == Right) {
      if (IsKeyPressed(KEY_UP)) snek.nextDir = Up;
      else if (IsKeyPressed(KEY_DOWN)) snek.nextDir = Down;
    } else {
      if (IsKeyPressed(KEY_LEFT)) snek.nextDir = Left;
      else if (IsKeyPressed(KEY_RIGHT)) snek.nextDir = Right;
    }

    if ((snek.nextDir == Left && snek.dir == Right)
     || (snek.nextDir == Right && snek.dir == Left)
     || (snek.nextDir == Up && snek.dir == Down)
     || (snek.nextDir == Down && snek.dir == Up)) {
      snek.nextDir = snek.dir;
    }

    if (snek.dir == Left) snek.cell.x -= 1;
    else if (snek.dir == Right) snek.cell.x += 1;
    else if (snek.dir == Up) snek.cell.y -= 1;
    else if (snek.dir == Down) snek.cell.y += 1;
...
  }
In principle, this code works.
However, there is one problem: depending on the hardware, the snake may be too fast or too slow.
On my PC, it moves like a bullet.
To solve this, I want to introduce delta time.
What is delta time?
Never heard of it!
Just kidding.
Basically, delta time ensures that movement is equally smooth on all hardware.
However, this does not mean you have to use delta time for everything.
It should only be used for automatic movement.
User-controlled movement should be done without delta time.
Otherwise, the player will experience input lag, which is not good.
    float deltaTime = GetFrameTime();
    if (deltaTime > 1.f / 5) deltaTime = 1.f / 5;

    if (snek.dir == Left || snek.dir == Right) {
      if (IsKeyPressed(KEY_UP)) snek.nextDir = Up;
      else if (IsKeyPressed(KEY_DOWN)) snek.nextDir = Down;
    } else {
      if (IsKeyPressed(KEY_LEFT)) snek.nextDir = Left;
      else if (IsKeyPressed(KEY_RIGHT)) snek.nextDir = Right;
    }

    if ((snek.nextDir == Left && snek.dir == Right)
     || (snek.nextDir == Right && snek.dir == Left)
     || (snek.nextDir == Up && snek.dir == Down)
     || (snek.nextDir == Down && snek.dir == Up)) {
      snek.nextDir = snek.dir;
    }

    if (snek.dir == Left) snek.cell.x -= 1 * deltaTime;
    else if (snek.dir == Right) snek.cell.x += 1 * deltaTime;
    else if (snek.dir == Up) snek.cell.y -= 1 * deltaTime;
    else if (snek.dir == Down) snek.cell.y += 1 * deltaTime;
Now you can control the snake.
I think the movement is too slow.
To fix that, you can multiply deltaTime by speed.
    float speed = 2.5f;
    float deltaTime = GetFrameTime() * speed;
...
Let's move float speed = 2.5f; outside the function.
Initialize speed to 2.5f in the Init method.
This allows you to gradually make the snake faster as the game progresses.
  float speed;
...
  bool GameMain::Init() {
    speed = 2.5f;
...
  }
There is another problem.
If you start the game and quickly press up and left as fast as possible, the snake will turn left without going up first.
This is a problem.
To fix it, you need to add an additional check:
    int curGridX = static_cast<int>(snek.cell.x);
    int curGridY = static_cast<int>(snek.cell.y);
    static int prevGridX = curGridX;
    static int prevGridY = curGridY;

    if ((curGridX != prevGridX) || (curGridY != prevGridY)) {
      snek.dir = snek.nextDir;
      prevGridX = curGridX;
      prevGridY = curGridY;
    }
Now the snake goes up first and then left.
It may look like it's going up and left at the same time, but it's better than the snake eating itself.
You may have noticed that I calculate all events first, then draw to the screen.
This is the recommended way.
It's always better to process logic first and then draw the results to the screen.
Not the other way around.
In simple games like Snake it's not much of a problem, but in more complex projects, drawing first or calculating while drawing can cause lag.
Not lag in the sense that the hardware has to think, but in the sense that the player notices that actions happen seconds after input.
In games, actions need to appear as synchronized with input as possible.
Another thing you should know is that order matters even between calculations.
For example, collisions related to movement need to be checked after movement, not before.
If done before, you will see the snake move outside the boundary first, and then game over.
We want the opposite order.
Game Over
Next, let's implement game over.
We'll display the game over screen when the snake hits a wall.
In gameover.cc:
#include <snake/scene/gameover.hh>
#include <snake/snake.hh>
#include <raylib.h>

namespace snake::scene {
  bool GameOver::Init() {
    return true;
  }

  bool GameOver::Update() {
    if (IsKeyPressed(KEY_ENTER)) {
      snake::Close();
      snake::s = snake::GameMain;
      snake::Init();
    }

    ClearBackground(BLACK);

    int fontSize = 24;
    int textWidth = MeasureText("GAME OVER", fontSize);
    DrawText("GAME OVER", GetScreenWidth() / 2 - textWidth / 2, GetScreenHeight() / 2 - 30, fontSize, RED);

    fontSize = 16;
    textWidth = MeasureText("PRESS ENTER TO TRY AGAIN", fontSize);
    DrawText("PRESS ENTER TO TRY AGAIN", GetScreenWidth() / 2 - textWidth / 2, GetScreenHeight() / 2 + 30, fontSize, RED);
    return true;
  }

  void GameOver::Close() {
  }
} // namespace snake::scene
In gamemain.cc:
...
#include <snake/snake.hh>
...
  bool isDead = false;
...
    // 壁を打ったかどうか確認
    if ((snek.cell.x < 0 || snek.cell.x > MAX_CELLX)
     || (snek.cell.y < 0 || snek.cell.y > MAX_CELLY)) {
      snake::Close();
      snake::s = snake::GameOver;
      snake::Init();
      return true;
    }
...
Food
Next, implement food.
Food always spawns at a random location on the grid, and eating it makes the snake grow.
We'll do the growth part next.
The food color is random, and that determines the snake's body.
...
  struct Food {
    Vector2 cell;
    Color color;
  };

  Food food = { 0 };
...
  bool GameMain::Init() {
...
    food.cell = {
      static_cast<float>(GetRandomValue(0, MAX_CELLX - 1)),
      static_cast<float>(GetRandomValue(0, MAX_CELLY - 1)),
    };

    Color foodCol;
    foodCol.r = GetRandomValue(100, 255);
    foodCol.g = GetRandomValue(100, 255);
    foodCol.b = GetRandomValue(100, 255);
    foodCol.a = 255;
    food.color = foodCol;
...
  }
...
  bool GameMain::Update() {
...

    // フード
    int fX = static_cast<int>(food.cell.x) * CELL_SIZE;
    int fY = static_cast<int>(food.cell.y) * CELL_SIZE;
    DrawRectangle(cX + fX, cY + fY, CELL_SIZE, CELL_SIZE, food.color);

    // デバッグ
    DrawText(TextFormat("SNAKE: %.0f, %.0f", snek.cell.x, snek.cell.y), 10, 10, 20, YELLOW);
    DrawText(TextFormat("FOOD: %.0f, %.0f", food.cell.x, food.cell.y), 200, 10, 20, YELLOW);
    DrawText(TextFormat("MAX CELL: %d, %d", MAX_CELLX, MAX_CELLY), 10, 30, 20, YELLOW);
...
  }
...
Food placement works.
However, it has no meaning if you do nothing.
For that, the snake needs to collide with the food, count up points, and respawn it in another location.
Don't worry about the growth part.
We'll do it next.
Also, note that the random maximum value is the grid size maximum minus 1.
If you don't subtract 1, food can spawn outside the boundary and become unreachable.
So we want to keep food inside the grid.
For colors, keep RGB values between 0x64 and 0xFF (i.e., 100 to 255) so they look bright enough.
As a systems engineer, this might remind you of CSS?
First, make food initialization a function.
  void placeFood() {
    food.cell = {
      static_cast<float>(GetRandomValue(0, MAX_CELLX - 1)),
      static_cast<float>(GetRandomValue(0, MAX_CELLY - 1)),
    };

    Color foodCol;
    foodCol.r = GetRandomValue(100, 255);
    foodCol.g = GetRandomValue(100, 255);
    foodCol.b = GetRandomValue(100, 255);
    foodCol.a = 255;
    food.color = foodCol;
  }

  bool GameMain::Init() {
    snek.cell = { 10, 10 };
    snek.color = RED;
    snek.dir = Right;

    placeFood();

    return true;
  }
Next, let's track the score.
To make it accessible from the game over screen too, put it in snake.hh.
extern int score;Back to gamemain.cc:
...
namespace snake {
  int score;
} // namespace snake

namespace snake::scene {
...
  bool GameMain::Init() {
    score = 0;
...
  }
...
This ensures the score is always 0 when starting the main game.
Otherwise, if the player reaches the game over screen with 9000 points, the next attempt will also start from 9000 points, but as a baby snake.
That doesn't make sense.
    // フードを食べたかどうか確認
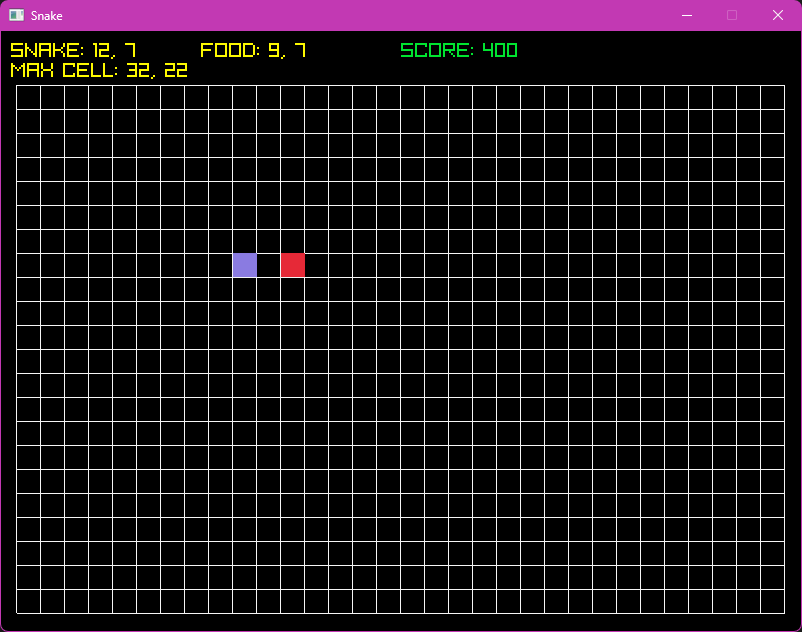
    if ((static_cast<int>(snek.cell.x) == static_cast<int>(food.cell.x))
     && (static_cast<int>(snek.cell.y) == static_cast<int>(food.cell.y))) {
      score += 100;
      speed += .5f;
      placeFood();
    }
The X and Y values of Vector2 are float by default, so we need to cast them to integers.
Precision points + continuous movement doesn't work well with grid-based systems.
As a result, it collides from the top-left of the food itself instead of the food.
Downcasting to int makes it more accurate.
To increase difficulty, raise the speed increase and lower the score.
Example: speed += .8f; and score += 50;
Or make it easier with speed += .2f; and score += 200;.
It's completely up to you.
Growing the Body
As promised, now let's make the snake's body grow.
This is the last missing part of the game, so let's clean it up.
...
#include <vector>
...
  struct SnakeSegment {
    Vector2 cell;
  };

  struct Snake {
    std::vector<SnakeSegment> body;
    Color color;
    SnakeDir dir;
    SnakeDir nextDir;
  };

  Vector2 oldPos;
...
  bool GameMain::Init() {
    score = 0;
    speed = 2.5f;

    snek.body.clear();
    snek.body.push_back({ { 10, 10 }, RED });
    snek.body.push_back({ { 9, 10 }, GREEN });
    snek.body.push_back({ { 8, 10 }, BLUE });

    snek.dir = Right;
    snek.nextDir = snek.dir;

    placeFood();

    return true;
  }
...
  bool GameMain::Update() {
    float deltaTime = GetFrameTime() * speed;
    if (deltaTime > 1.f / 5) deltaTime = 1.f / 5;

    if (snek.dir == Left || snek.dir == Right) {
      if (IsKeyPressed(KEY_UP)) snek.nextDir = Up;
      else if (IsKeyPressed(KEY_DOWN)) snek.nextDir = Down;
    } else {
      if (IsKeyPressed(KEY_LEFT)) snek.nextDir = Left;
      else if (IsKeyPressed(KEY_RIGHT)) snek.nextDir = Right;
    }

    if ((snek.nextDir == Left && snek.dir == Right)
     || (snek.nextDir == Right && snek.dir == Left)
     || (snek.nextDir == Up && snek.dir == Down)
     || (snek.nextDir == Down && snek.dir == Up)) {
      snek.nextDir = snek.dir;
    }

    oldPos = snek.body[0].cell;

    if (snek.dir == Left) snek.body[0].cell.x -= 1 * deltaTime;
    else if (snek.dir == Right) snek.body[0].cell.x += 1 * deltaTime;
    else if (snek.dir == Up) snek.body[0].cell.y -= 1 * deltaTime;
    else if (snek.dir == Down) snek.body[0].cell.y += 1 * deltaTime;

    int curGridX = static_cast<int>(snek.body[0].cell.x);
    int curGridY = static_cast<int>(snek.body[0].cell.y);

    if ((curGridX != prevGridX) || (curGridY != prevGridY)) {
      snek.dir = snek.nextDir;
      for (size_t i = snek.body.size() - 1; i > 0; --i)
        snek.body[i].cell = snek.body[i - 1].cell;

      snek.body[1].cell = oldPos;

      prevGridX = curGridX;
      prevGridY = curGridY;
    }

    // フードを食べたかどうか確認
    if ((curGridX == static_cast<int>(food.cell.x))
     && (curGridY == static_cast<int>(food.cell.y))) {
      score += 100;
      speed += .5f;

      SnakeSegment seg = snek.body.back();
      seg.color = food.color;
      snek.body.push_back(seg);
      placeFood();
    }

    // 壁を打ったかどうか確認
    if ((snek.body[0].cell.x < 0 || snek.body[0].cell.x > MAX_CELLX)
     || (snek.body[0].cell.y < 0 || snek.body[0].cell.y > MAX_CELLY)) {
      snake::Close();
      snake::s = snake::GameOver;
      snake::Init();
      return true;
    }

    ClearBackground(BLACK);

    // グリッド
    int cX = static_cast<int>(gridPos.x);
    int cY = static_cast<int>(gridPos.y);
    for (int h = 0; h <= MAX_CELLY; ++h) {
      int y = cY + h * CELL_SIZE;
      DrawLine(cX, y, cX + MAX_CELLX * CELL_SIZE, y, RAYWHITE);
    }
    for (int w = 0; w <= MAX_CELLX; ++w) {
      int x = cX + w * CELL_SIZE;
      DrawLine(x, cY, x, cY + MAX_CELLY * CELL_SIZE, RAYWHITE);
    }

    // プレイヤー
    for (const auto &seg : snek.body) {
      int pX = static_cast<int>(seg.cell.x) * CELL_SIZE;
      int pY = static_cast<int>(seg.cell.y) * CELL_SIZE;
      DrawRectangle(cX + pX, cY + pY, CELL_SIZE, CELL_SIZE, seg.color);
    }

    // フード
    int fX = static_cast<int>(food.cell.x) * CELL_SIZE;
    int fY = static_cast<int>(food.cell.y) * CELL_SIZE;
    DrawRectangle(cX + fX, cY + fY, CELL_SIZE, CELL_SIZE, food.color);

    // スコア
    DrawText(TextFormat("SCORE: %d", score), 10, 10, 20, GREEN);

    return true;
  }
...
I removed the debug text since it's no longer needed.
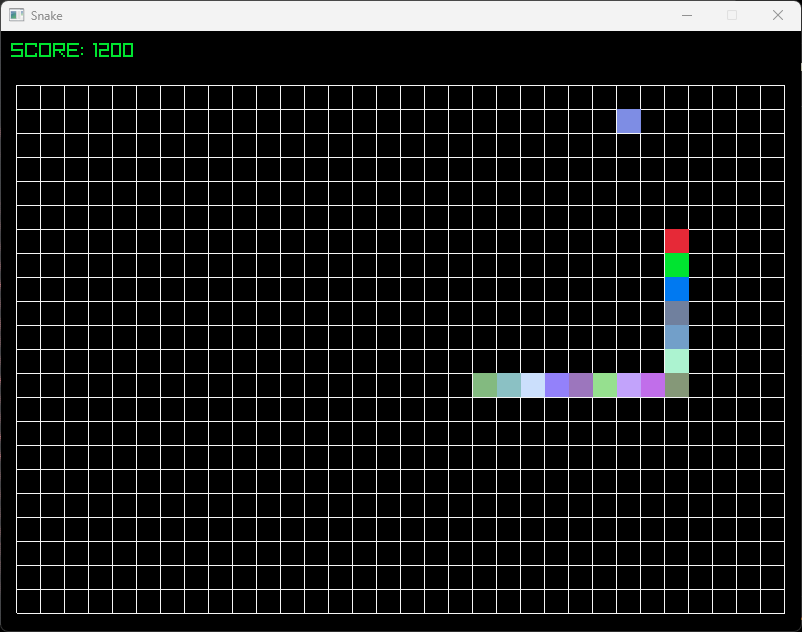
I created a new struct for snake segments and moved the cell and color properties there.
This allows us to track the snake's body.
Only the first segment moves, and the other segments follow the head.
When the snake eats food, it grows with the same color as the food.
There is a reason I declared Vector2 oldPos; at global scope.
Initializing it inside the update loop adds overhead, causes slowdowns, and more annoyingly, causes unresponsive input.
So declare it once and assign inside the update loop.
One piece of advice I want to give:
If there's a bug you don't know how to solve, proceed to the next task unless it prevents you from completing the current one, and fix the bug later.
This happens often in the real world.
The solution may come later, so instead of getting stuck on the same problem forever, try moving on to the next task.
You'll eventually figure out what was wrong.
Now, let's implement body collision.
...
  bool selfCollide() {
    const Vector2 &head = snek.body[0].cell;
    int headX = static_cast<int>(head.x);
    int headY = static_cast<int>(head.y);

    for (size_t i = 1; i < snek.body.size(); ++i) {
      int bodyX = static_cast<int>(snek.body[i].cell.x);
      int bodyY = static_cast<int>(snek.body[i].cell.y);

      if (headX == bodyX && headY == bodyY) return true;
    }

    return false;
  }
...
  bool GameMain::Update() {
...
    if ((curGridX != prevGridX) || (curGridY != prevGridY)) {
      snek.dir = snek.nextDir;
      for (size_t i = snek.body.size() - 1; i > 0; --i) snek.body[i].cell = snek.body[i - 1].cell;

      prevGridX = curGridX;
      prevGridY = curGridY;

      if (selfCollide()) {
        snake::Close();
        snake::s = snake::GameOver;
        snake::Init();
        return true;
      }
    }
...
  }
Now the snake dies when it touches itself.
Score on Game Over
Final touch: display the score on the game over screen and also track high score.
The high score isn't saved anywhere, so it resets every time you run the game, but it is retained between retries.
In gameover.cc:
...
  int highScore = 0;
...
  bool GameOver::Init() {
    if (snake::score > highScore) highScore = snake::score;
    return true;
  }
...
  bool GameOver::Update() {
...
    const char *score = TextFormat("SCORE: %d", snake::score);
    textWidth = MeasureText(score, fontSize);
    DrawText(score, GetScreenWidth() / 2 - textWidth / 2, GetScreenHeight() / 2 + 30, fontSize, RED);

    const char *hScore = TextFormat("HIGH SCORE: %d", highScore);
    textWidth = MeasureText(hScore, fontSize);
    DrawText(hScore, GetScreenWidth() / 2 - textWidth / 2, GetScreenHeight() / 2 + 60, fontSize, RED);
...
  }
...
Sound Effects and Music
You can add sound effects every time the snake eats food, every time the snake dies, and when Enter is pressed on the title and game over screens.
You can also add a simple song to the game.
You can download them here:
BGM
Confirm SFX
Death SFX
Food SFX
To integrate them into the game, convert them to embeddable bytes in the code.
This allows releasing a single binary, and you don't need to teach players about the file structure.
$ xxd -i snake-bgm.mp3 > snake.bgm.h
$ xxd -i snake-confirm.mp3 > snake-confirm.h
$ xxd -i snake-die.mp3 > snake-die.h
$ xxd -i snake-food.mp3 > snake-food.h
In snake.hh:
...
  enum Sfx {
    None = 0,
    Confirm,
    Die,
    Food,

    SFX_COUNT,
  };

  extern Sfx sfx;
...
  void PlaySFX(int sound, float volume);
...
Sound effects need to be accessible from anywhere.
Music can only be loaded inside snake.cc.
In snake.cc:
...
#include "../ass/snake-bgm.h"
#include "../ass/snake-confirm.h"
#include "../ass/snake-die.h"
#include "../ass/snake-food.h"

#include <vector>
#include <raylib.h>
#include <raymath.h>
...
  Music bgm = { 0 };
  std::vector<Sound> allSnd;

  void PlayBGM();
  void StopBGM();
  bool IsBGMPlaying();
  void UpdateBGM();

  bool Init() {
    switch (s) {
      case GameMain:
        PlayBGM();
        return gm.Init();
        break;
      case GameOver:
        return go.Init();
        break;
      default: {
        InitAudioDevice();
        SetMasterVolume(.9);
        {
          allSnd.resize(SFX_COUNT);
          Wave w;

          w = LoadWaveFromMemory(".mp3", snake_confirm_mp3, snake_confirm_mp3_len);
          allSnd[Confirm] = LoadSoundFromWave(w);
          UnloadWave(w);

          w = LoadWaveFromMemory(".mp3", snake_die_mp3, snake_die_mp3_len);
          allSnd[Die] = LoadSoundFromWave(w);
          UnloadWave(w);

          w = LoadWaveFromMemory(".mp3", snake_food_mp3, snake_food_mp3_len);
          allSnd[Food] = LoadSoundFromWave(w);
          UnloadWave(w);
        }
        return ts.Init();
      }
      break;
    }
  }

  bool Update() {
    switch (s) {
      case GameMain:
        UpdateBGM();
        return gm.Update();
        break;
      case GameOver:
        return go.Update();
        break;
      default:
        return ts.Update();
        break;
    }
  }

  void Close() {
    switch (s) {
      case GameMain:
        StopBGM();
        gm.Close();
        break;
      case GameOver:
        go.Close();
        break;
      default:
        ts.Close();
        break;
    }
  }

  void PlaySFX(int sound, float volume) {
    if (sound <= None || sound >= SFX_COUNT) return;
    volume = Clamp(volume, 0.f, 1.f);
    SetSoundVolume(allSnd[sound], volume);
    PlaySound(allSnd[sound]);
  }

  void PlayBGM() {
    if (IsBGMPlaying()) return;
    bgm = LoadMusicStreamFromMemory(".mp3", snake_bgm_mp3, snake_bgm_mp3_len);
    bgm.looping = true;
    SetMusicVolume(bgm, 1.f);
    PlayMusicStream(bgm);
  }

  void StopBGM() {
    if (!IsBGMPlaying()) return;
    StopMusicStream(bgm);
    UnloadMusicStream(bgm);
  }

  bool IsBGMPlaying() {
    return IsMusicStreamPlaying(bgm);
  }

  void UpdateBGM() {
    if (!IsBGMPlaying()) return;
    UpdateMusicStream(bgm);
  }
title.cc:
    if (IsKeyPressed(KEY_ENTER)) {
      snake::PlaySFX(snake::Confirm, 1.f);
      snake::Close();
      snake::s = snake::GameMain;
      snake::Init();
    }
gameover.cc:
    if (IsKeyPressed(KEY_ENTER)) {
      snake::PlaySFX(snake::Confirm, 1.f);
      snake::Close();
      snake::s = snake::GameMain;
      snake::Init();
    }
gamemain.cc:
...
      if (selfCollide()) {
        snake::PlaySFX(snake::Die, 1.f);
        snake::Close();
        snake::s = snake::GameOver;
        snake::Init();
        return true;
      }
...
    // フードを食べたかどうか確認
    if ((curGridX == static_cast<int>(food.cell.x))
     && (curGridY == static_cast<int>(food.cell.y))) {
      score += 100;
      speed += .5f;

      SnakeSegment seg = snek.body.back();
      seg.color = food.color;
      snek.body.push_back(seg);
      snake::PlaySFX(snake::Food, 1.f);
      placeFood();
    }
...
    // 壁を打ったかどうか確認
    if ((snek.body[0].cell.x < 0 || snek.body[0].cell.x > MAX_CELLX)
     || (snek.body[0].cell.y < 0 || snek.body[0].cell.y > MAX_CELLY)) {
      snake::PlaySFX(snake::Die, 1.f);
      snake::Close();
      snake::s = snake::GameOver;
      snake::Init();
      return true;
    }
...
Title Screen
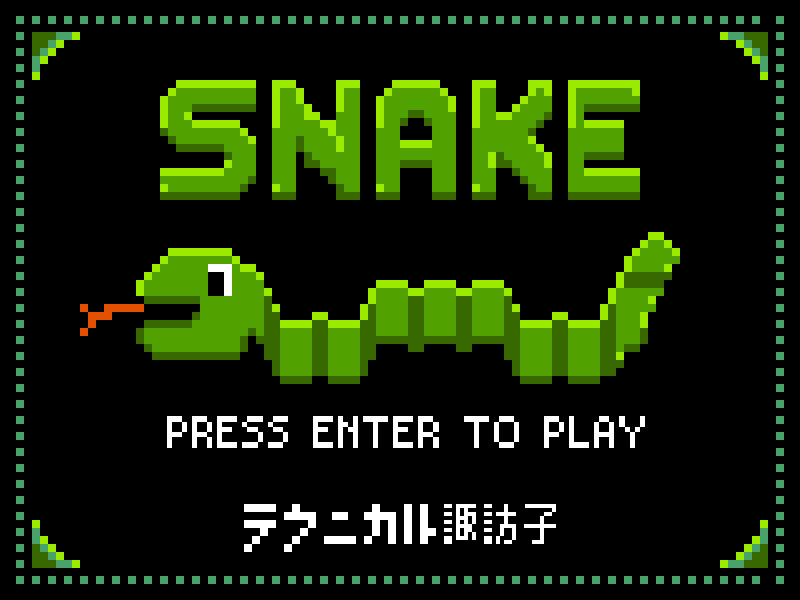
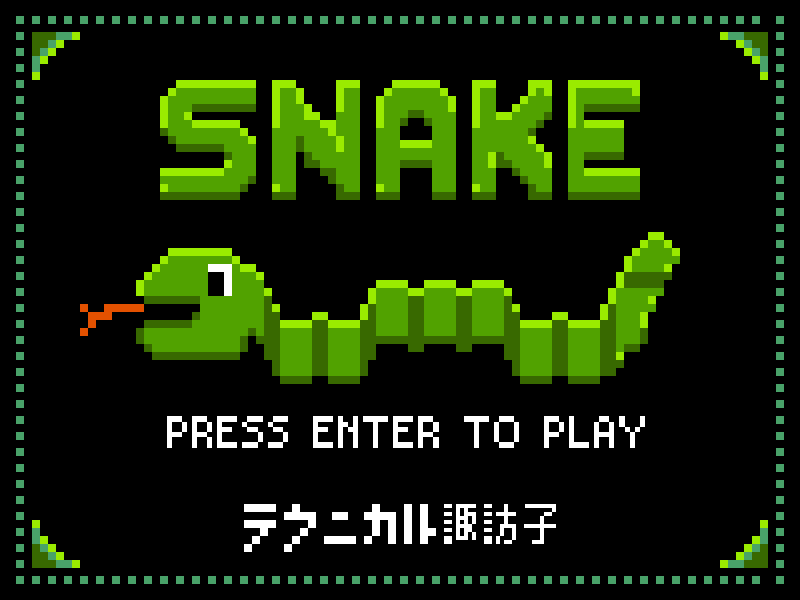
Now, all I want to do is make a good-looking title screen.
To maintain consistency, I want an 8-bit style.
I created it in Aseprite.
Image
Source
$ xxd -i snake-title.png > snake-title.hIn title.cc:
#include <snake/scene/title.hh>
#include <snake/snake.hh>
#include <raylib.h>

#include "../ass/snake-title.h"

namespace snake::scene {
  static Texture2D bg{};

  bool TitleScreen::Init() {
    Image img = LoadImageFromMemory(".png", snake_title_png, snake_title_png_len);
    bg = LoadTextureFromImage(img);
    UnloadImage(img);

    return true;
  }

  bool TitleScreen::Update() {
    if (IsKeyPressed(KEY_ENTER)) {
      snake::PlaySFX(snake::Confirm, 1.f);
      snake::Close();
      snake::s = snake::GameMain;
      snake::Init();
    }

    ClearBackground(BLACK);
    DrawTexture(bg, 0, 0, WHITE);

    return true;
  }

  void TitleScreen::Close() {
    UnloadTexture(bg);
  }
} // namespace snake::scene
Conclusion
Now you have a complete game!
I will also release the complete playable game here:
Download
Now that you've completed your first game, let's make the second one something more difficult.
That's all